Showing posts with label Nature. Show all posts

Wednesday, April 18, 2012

Wild Forest Plants

Yesterday we went on a nature hike with an awesome guide who knew all sorts of edible plants that are found wild in our local wood lands. Here are some of the plants that we identified on our hike:

Snake root:
Wild grapes that will grow up the tree (leaves and fruit are edible):
Flax:
Germanium:
Violet (state flower for Rhode Island, New Jersey, and Illinois):
Wild raspberries (fruit is edible):

May apple (fruit is edible in June):
Wild plum tree (fruit is edible):

Black locus tree flowers that have an amazing sweet scent:

Tuesday, April 17, 2012

Mushroom Hunting

We went on a super cool field trip this morning. We went mushroom hunting! We did not find a lot of mushrooms, but we had a blast. We had an excellent guide that knew every plant that we came across on our hike. Here is the fungus that we saw on our hike:

Unidentifiable little brown mushroom:


Rhizomorphs which kills trees, so this is bad news for our forest:

fungus that kills trees

Phellinus robiniae growing on a black locus tree:

shell mushroom growing on a tree


Tuesday, April 10, 2012

Paper Mâché Bluebirds


We have been continuing to work on our bluebird studies. I decided to take a big leap and have us attempt paper mâché bluebirds.  For me this is a big step in our homeschool because I am not particularly artistic, and this is a very messy multi day project. I was nervous to say the least, but how could I turn down trying the beautiful paper mâché birds as seen on Art For Small Hands?  Little BBQ had been requesting more three dimensional projects, so I thought this would be a nice creative project to attempt. Our birds came out surprisingly cute even though we forgot to use card board for the tail feathers.


We used regular all purpose flour and water for our paper mâché, and we attempted to fill in some of the holes left by the newspaper with dryer lint pulp mixed with our mâché paste. The dryer lint pulp was also good for forming a beak. We used Crayola washable tempura paints to paint the birds which did not completely cover the newspaper which really bothered me at first, but then I realized that seeing the newspaper under the paint gave the bluebirds a Jasper Johns feel. We did not put wire legs on birds because I did not feel that Little BBQ had the coordination to bend wire right now without hurting himself. Instead we opted to put our bluebirds on nests made from paper Easter grass.

For bluebird inspiration we used the kids book from the North American Bluebird Society, a photo from the blog Content in a Cottage, and a gallery on 12 beautiful bird photos

Materials

Newspaper, cut into strips and 1 whole piece for the body
Thin card board
Scissors
Half inch masking tape
Bowl
All purpose flour
Water
Dryer lint
Paint brushes
Rinsing bowls
Paper towels
Card board box large enough to fit the bluebirds
Goggles or safety glasses
Easter grass

Directions

Day 1:

1.       Wrinkle the whole sheet of newspaper into a ball to form the body of the bird. You can shape the ball into more of a tear drop shape which is close to a bird shape than a ball.
2.       Cut the wings and tail feathers out of cardboard using the scissors. Use your bluebird pictures for inspiration. We cut a semicircle for the wings which was probably not the best shape to use. Next time I think I would cut each wing individually.
3.       Tape the wings and tail feathers to the newspaper body of the bird with the masking tape.
4.       In a bowl, make a paper mâché paste with flour and water. We used 1 part flour to 2 parts water for our paper mâché paste. You can make your paste a little thinner or thicken depending upon your preferences.
5.       Dip the newspaper strips into the paste and wipe off the excess paste. Drape the newspaper strip on the bluebird.
6.       Continue with step 5 until the bluebird is completely covered.
7.       Dip the dryer lint into the paper mâché paste to form clay like substance.
8.       Use the dryer lint putty to fill in holes in the paper mâché and to form small details like the beak.
9.       Allow the bluebird to dry. We dried our bluebirds on a plate. We dried the bluebirds on their belly which was a mistake because we ended up tearing a little bit of the paper mâché when lifted up the blue birds after they dried. Net time I would have let them dry on the flat surface of their wings.

Day 2:

10.   Paint the bluebirds. We made male Easter bluebirds using photos for inspiration. In general, male Easter bluebirds have a blue head and wings, a white stomach, an orange neck and a black beak.

Day 3:

11.   Place the bluebirds in a cardboard box. Spray the bluebirds with spray polyurethane while wearing goggles or safety glasses. Follow the directions on the spray can for best results.  I did this part for Little BBQ outside because I was not comfortable with him using the polyurethane. Allow the bluebirds to dry.

Day 4:

12.   Display the bluebirds on a nest of Easter grass.


Posted on Link and Learn, Science Sunday
Carnival of Homeschooling

Tuesday, March 20, 2012

Building Secondary Cavity Nesting Bird Nests: Bluebird, House Wren, Tree Swallow, Carolina Chickadee, House Sparrow


We have been studying birds as part of our nature study in the past few weeks. In particular, we have been focusing on the Bluebird. Bluebirds are secondary cavity nesters meaning that they can not build their own nests. Instead they find homes that woodpeckers (primary cavity nesters) or humans leave behind for them. Bluebirds are part of the Sialia genus of the thrush family. Gardeners love Bluebirds because they are primarily insectivores (insect eaters) and dine on garden pests.

The trouble is that many other birds will also reside inside of a Bluebird house, so it is important to be able to identify birds by their nests. Some other birds that can make their home in a Bluebird house are House Wren, Tree Swallow, Carolina Chickadee, or House Sparrow. For the Bluebird enthusiast, there is only one type of bird that really poses a threat and that is the House Sparrow. The House Sparrow is not native to the US and is very aggressive. The House Sparrow can and will kill a Bluebird. The House Sparrow has been partially blamed for declining Bluebird numbers along with humans destroying their habitat.

To help Little BBQ learn about potential birds that can make their home in small cavities we decided to do a hands on project where a built sample nests from secondary cavity nesters. Each type of bird has an unique nest. We built out nests in foam cups with one side cut open so you can see inside the "cavity."

Eastern Bluebird Nest


Materials:

dry grass
pine needles

The details:
One or both types of materials maybe used depending upon availability. The nests do not fill up the entire cavity, so there is plenty of head space in this cavity.

House Wren

Materials:
twigs
finer plant material (we used crumbled leaves)
feathers (we used paper feathers since we could not find any real ones outside)

The details:
The bulk of the nest is composed of twigs with some feather and finer plant material lining the inside of the nest as well. The cavity is usually filled to the top.

Tree Swallow

Materials:
grass
feathers (we used paper feathers)

The details:
The bulk of the nest is made out of grass with feathers lining the top. The nest has lots of head space and does not fill up the entire cavity.

Carolina Chickadees

Materials:
moss
very fine plant fibers (we used crumbled leaves)
animal hair
dryer lint

The details:
A Carolina Chickadee is flexible about what type of material the bird is willing to use to build its nest. We used animal hair, dryer lint, and crumbled leaves for our nest since we could not find any moss in the backyard. A Carolina Chickadee builds small soft nests that are meticulously built. A Carolina Chickadee is most likely to settle in a Bluebird house.

House Sparrow
Materials:
straw
paper
string
cloth

The details:
The House Sparrow will fill their cavity to the brim with a wide assortment of found materials.

References
"House Sparrow Kills Eastern Bluebirds" Journal of Field Ornithology. Summer 1984. pp 378-380.
North American Bluebird Society Educational Packet: information on nests found on pages 18-19

Photo Credits
All "nests" were taken by me
Bluebird Photo: Ken Thomas released to public domain
House Wren Photo: Calibas released under GNU Free Documentation License 
Tree Swallow Photo: John Benson released under Creative Commons
Carolina Chickadee Photo: Dan Pancamo under Creative Commons
House Sparrow Photo: Photo by DAVID ILIFF. License: CC-BY-SA 3.0

Monday, March 12, 2012

Toddler Nature Journal


It seems that everyone is talking about nature journals these days. They are a very popular tool for teaching children drawing, observation skills, and science. At our house, we use nature journals for even the smallest hands. A lot of people ask me how I manage to teach Little BBQ while having Miss Bubbles running around. Some things we do while Miss Bubbles naps, but there are some things that she participates in. Nature journaling is great for little hands. We use a combination of collected items, drawing, and photos for Miss Bubbles’ nature journal. Most of the photographs are of Miss Bubbles interacting with nature. I will also take photos or let her take photos of things that interest her. In the sample page above Miss Bubbles sampled some wild green onions, picked up lots of sticks, and hugged lots of trees.  She glued a feather into her book that she found while walking. We use basic white glue for her book. If you look closely you can see her excessive use of glue that is the toddler trademark, but luckily it dries clear so no harm to the notebook is done. I add the date and sometimes the location to each page.

Pictured below is Little BBQ’s nature journal page from the same day. For Little BBQ’s nature journal, we use found items (although he did not find anything that he felt was worth collecting on that day), photos of things that he finds interesting, drawings, observations, and photos of him interacting with nature. 

Thursday, February 9, 2012

Pinecone, Lard, and Bird Seed Winter Bird Feeders


We have been having an usually mild winter this year, but we decided to give the birds some good winter time bird food anyway. In general, birds need more fat during winter time, so we used lard in our winter bird seed this year instead of peanut butter because we got a half pig last year. Pigs have a lot of lard on them, and I have been struggling to figure out what to do with the all the lard. After a few batches of tamales and tortillas I still have lots of lard. I decided that the birds would probably enjoy some nice bird seed and lard since I was told by a local farmer that birds love lard.
To make these simple bird feeders, you just take some fallen pine cones and rub them in lard. Then, you can sprinkle some bird seed on top of the lard. We use a generic wild bird seed mix that attracts lots of different birds to our yard. Finally, hang up your easy bird feeders outside.

Friday, September 9, 2011

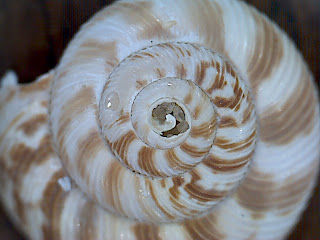
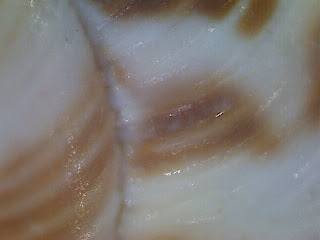
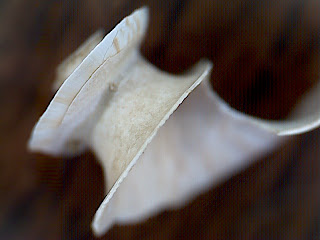
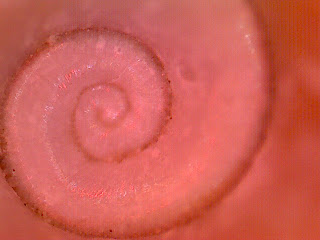
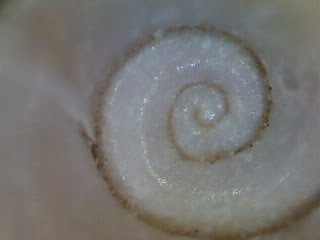
Microscope pictures of sea shells from Lake Michigan

Last week we visited Lake Michigan, so Little BBQ picked up a few tiny sea shells at the beach that were perfect for looking at under his microscope. I have had a few questions lately about what type of microscope we use at home. We use a Bresser Junior Digital Hand Microscope that can be purchased at Toys R Us. The microscope has terrible reviews on-line, but we have been very happy with the microscope. The microscope takes pictures at either 20x or 200x zoom. There is no eye piece to look through to focus the image because the image shows up on your computer screen making it much easier for a parent to teach a child how to focus a microscope. There are multiple light settings including white, red (Little BBQ's favorite), and red and white together. To capture an image you just click the blue button on top of the microscope. From there you can save the image to your computer. Little BBQ has found the microscope very easy to use. We use windows, and we have had no problems loading or using the software. For less than $20 I consider this microscope a steal.

Here are some images of his sea shells:

Taken at 20x magnification:
Taken at 200x magnification:
More shells:

Little BBQ's favorite setting with the red light:

Friday, July 15, 2011

Garfield Park Conservatory and Sunken Garden in Indianapolis


We have had a very busy summer this year. The kid’s grandmother whom prefers to be called Bushka since she is too young to be a grandmother ;) has arrived to visit the children. We decided to take a trip to the Garfield Park Conservatory and Sunken Gardens in Indianapolis, IN. For one dollar you can tour the conservatory on your own for as long as you wish from 10 am to 5 pm Monday through Saturday or from 1 pm to 5 pm on Sunday. The sunken gardens are open from 10 am to 9 pm from April 23 to October 11th and 10 am to 5 pm from October 21st to April 22nd.
I consider this trip to be a bargain. The conservatory has an amazing array of different tropical plants that are all picture perfect. The conservatory has beautiful landscaping with small little ponds and waterfalls. Because the plants are all tropical, it is a very hot and humid location, so I would recommend wearing shorts when you visit. My words can not relish enough praise upon this fabulous location. I think pictures can do more justice to this amazing place. Here are some of our favorite pictures from the conservatory:

Unfortunately, we went to the conservatory first, then we went outside into the sunken gardens. While the sunken gardens were nice, according to Bushka, “they sunk” compared to the elaborate conservatory that puts you inside of a tropical paradise. The sunken gardens are a nice formal garden with nice blooming flowers in large patches, but they just don’t compare to the amazing conservatory.  Overall, I recommend anyone visiting Indianapolis to take a trip to the Garfield Park Conservatory. For one dollar you are getting an amazing deal.


Some pictures taken by Little BBQ (he has improved a lot):

Friday, June 3, 2011

Field Trip to Traders Point Creamery

This is one family field trip that I was really excited about. Traders Point Creamery stated selling at our local farmers market last summer, and I was really excited that we finally had more than just spotty access to the only grass fed and organic creamery in the country. Our small town had a small mom and pop grocery store that carried their milk sometimes; the grocery store said that their shipments from Traders Point Creamery were not always reliable so sometimes they had milk from them and sometimes they didn’t.
My family has been on many farms. Dr. Lazy Palate’s best friend growing up was a dairy farmer, so he is familiar with dairy farms. We knew for the most part all you were going to see on a tour was animals out in pastures which are always exciting for the kids especially Miss Bubbles who has associated cows with the sound, “mooo.” However, we were a bit disappointed with the tour. We took the self-guided tour ($2 for adults and free for children under 3) on a rainy muggy day since neither one of our kids were going to walk nicely for a guided tour after sitting the car after a long drive.
We were hoping to see more than just animals. We were hoping to see where the cheese was made and to find out a little more about their cheese making. However, there was only a little small room where you could look inside to see some of the cheese making equipment, but due to the weather the window had a lot of condensation build up so we could not see inside the cheese making room.  
There are a few other cons of Traders Point Creamery as well. Traders Point Creamery milk is very expensive. For one quart of milk it costs $4.00. That makes the milk $12 a gallon. Commercial organic milk that is not grass fed here costs $6 a gallon, so that is double in price. Outside of price, another frustration that I have with Traders Point Creamery is that they buy milk from other local farmers and resell it under their label. I find it a bit frustrating that I am paying that much money for milk that is not necessarily from Traders Point Creamery. Luckily, an Amish farm has recently started selling milk at our farmers market. Their milk is 100% grass fed and uncertified organic. One gallon of milk costs $6 or $5 if you join their milk share program. This is much more economical, and I have not noticed a difference in taste between their milk and Traders Point Creamery.  I have also made cheese with both milks, and I have not had trouble with either. My last source of frustration with Traders Point Creamery is that they do not offer a buyback program for their glass bottles.  They sell their milk in a beautiful glass quart bottle. The bottle is very thick glass and very sturdy. Other dairies in our area charge you a deposit when you buy the milk for the glass bottle. Then when you return the bottle you get your deposit back. We have requested numerous times that Traders Point Creamery should offer a similar program, but the response back that we have heard is that they feel their customers are already environmentally minded and will recycle their glass bottles on their own. I know for a fact that not everyone is recycling their glass bottles. We live in a town where you have to pay a hefty amount of money for recycling, so we know some people are penny pitching right now and are just tossing their bottles in the garbage to save on costs.
On the upside of the tour we did get to see a mother pig nurse her babies which both kids enjoyed. We also got to see a one day old calf. It is amazing how large the calf was for one day. Delivering a human baby looks like a cake walk compared to delivering a baby calf. We also got to sample some of their maple yogurt which was good. The yogurt was sweet and creamy. We also tried some of their Fromage Blanc cheese which was fantastic. The cheese was spreadable, creamy, and rich. It is no surprise that Traders Point Creamery has fantastic cheese because they have master cheese makers like Fons Smits on staff1. Fons Smits started the creamery line for Traders Point Creamery1. Before working at Traders Point Creamery he set up dairy factories in Tanzania1. He also assisted with opening dairies in Asia and Europe1. He was also the developer of Mt. Tam, a cheese produce by Cowgirl Creamery1.  It is clear that Traders Point Creamery knows how to hire excellent talent and produce excellent cheese.
The self-guided tour is a bargain if you have never been to a farm before. However, many famers will allow you to tour their farm for free. Many farmers will even give you a guided tour for free, so it might be best contact one of your local farmers to see if they are open to letting you tour their farm. Many farmers are excited to give you a tour of farm to promote healthy eating to show people exactly where their food comes from.
At this point my feeling on Traders Point Creamery is neutral. I love that they are trying to provide grass fed milk to customers. I think that more people need to drink more milk from grass fed cows because cows that are on a 100% grass fed diet contain 5 times the amount of conjugated linoleic acid (CLA) than feed lot cows2. Milk is the primary source for a human to get CLA since beef provides very little CLA2. Conjugated linoleic acid helps protect the heart and helps aid in weight loss2. To get CLA in milk you have to drink whole milk since CLA is a fat soluble compound; many scientists argue that the health benefits of CLA outweigh the downside of saturated fat found in whole milk2. Given these health benefits I hope that more grass fed dairies open up in the future. If Traders Point Creamery is the only option that you have for grass fed milk, then I would highly recommend them. However, if you can find a more cost effective method for getting grass fed milk, then I would go this route. Our family has made the choice to primarily buy from a competing dairy that is uncertified organic to save on costs.
Related Posts Plugin for WordPress, Blogger...